How to Register a US Apple ID
Complete step-by-step tutorial directly on your mobile device. No proxy or VPN required.
I. Preparations
- A mobile phone number capable of receiving SMS (a domestic/mainland phone number works fine; verified: even if it has already been used for another Apple ID, there will be no conflict).
- A brand-new email address (an email address that has never been registered as an Apple ID, e.g., a fresh Outlook, Gmail, 163, or custom domain email).
- US Address Generator: https://www.meiguodizhi.com/
- Network Environment: No VPN or proxy tool is needed during registration; simply use your normal mobile cellular data or home Wi-Fi.
- Date of Birth: Make sure to set your age to over 18 years old (e.g., year 2000 or earlier), otherwise some apps will be blocked due to age restriction policies.
- Email Address: Use an email that has never been associated with any Apple account.
- Phone Number: You can safely reuse a phone number already linked to an existing Apple ID (e.g., China region); Apple does not restrict this.
- Password Security: Do NOT include parts of your name, birthday, or email prefix in your password. Otherwise, Apple's verification step will block you or fail with an error. Create an original and strong password.
II. Registration Tutorial
For convenience, this entire tutorial is conducted directly in the Safari browser on your iPhone without needing a computer.
1. Open the US Apple ID Registration Page
Copy the official registration URL below and open it in mobile Safari:
https://appleid.apple.com/account
2. Fill In Account Information
When entering your details, make sure Country / Region is selected as "United States", then follow the instructions in the screenshot below:

3. Verify Email and Phone Number
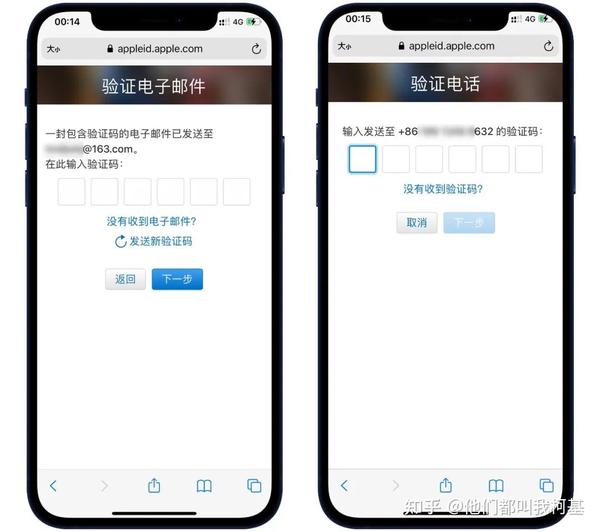
Apple will send 6-digit verification codes to your email and phone number respectively. Enter the codes in order and tap Next.
4. Navigate to Payment Methods
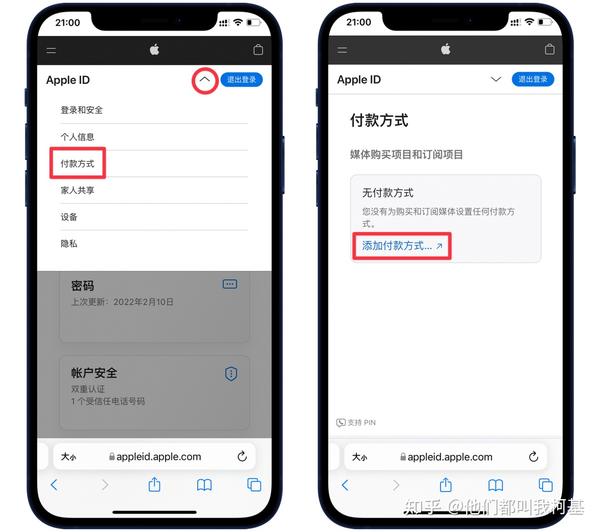
Once registered, your account will typically log in automatically (if not, log in manually with your new credentials). On your account overview page, tap the arrow next to Sign Out, select Payment Methods, then tap Add Payment Method.
5. Set Payment Method to "None" & Fill In US Billing Address
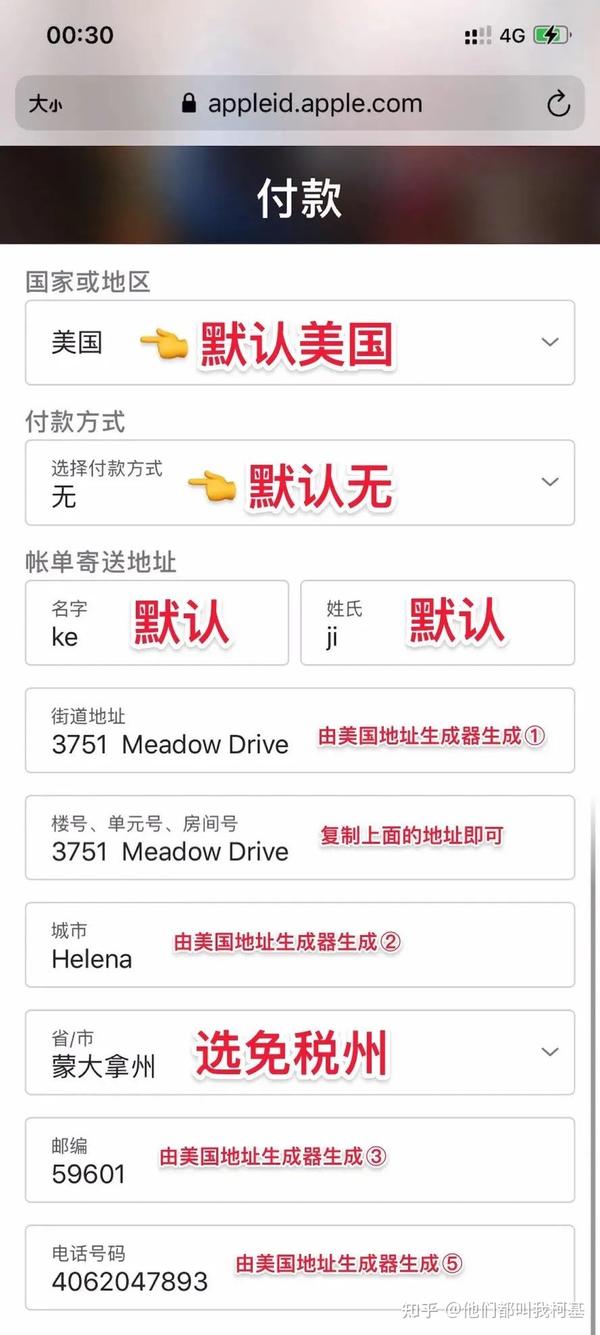
This is a crucial step: keep the Payment Method as "None". Do not bind foreign cards or non-US PayPal.
For the billing address, use the US Address Generator to automatically generate street, city, state, zip code, and phone number.
Copy the generated information and paste each field into the corresponding form inputs:
6. Check "Copy Billing Address" & Save
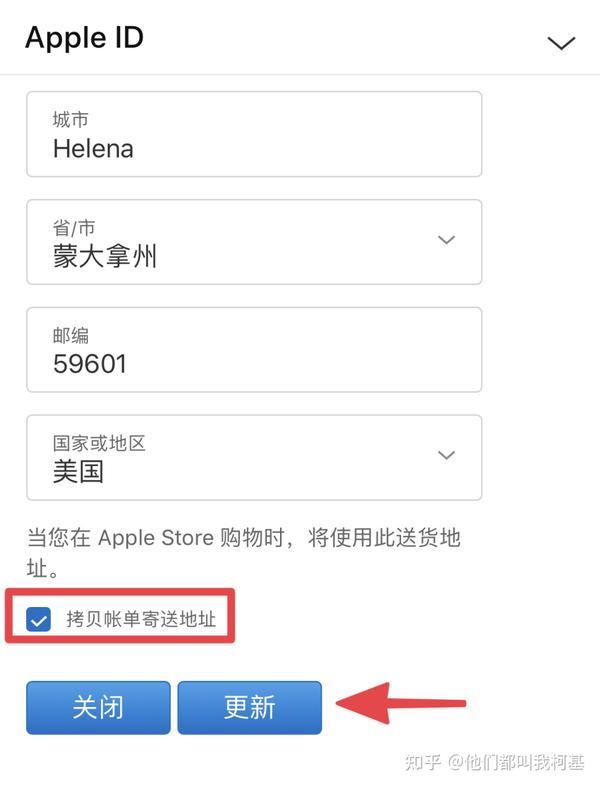
Check the box for "Copy billing address" (shipping address will automatically sync), scroll to the very bottom, and tap "Update" to save.
🎉 Your US Apple ID is now fully registered! Next, follow the instructions below to sign in and activate it in the App Store.
III. Sign In & Activate in App Store
NEVER sign into iCloud at the top of device Settings!
You only need to sign in inside the App Store app. After downloading your needed apps, you can switch back to your personal account anytime without affecting your local iCloud, photos, or contacts.
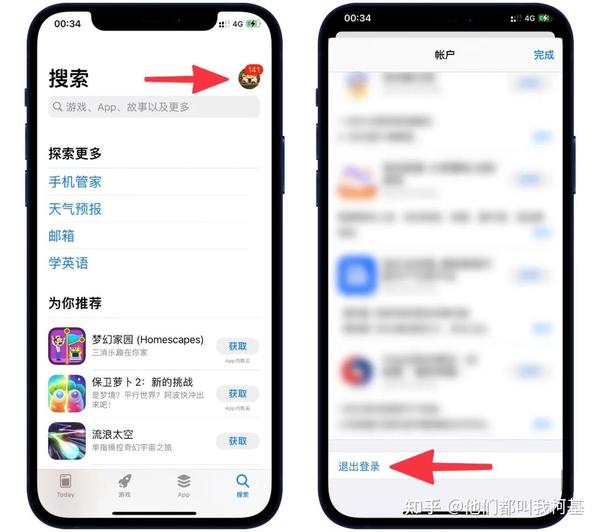
1. Sign Out of Current Account in App Store
Open the App Store on your phone, tap your avatar icon in the top-right corner, scroll all the way down to the bottom, and tap Sign Out.
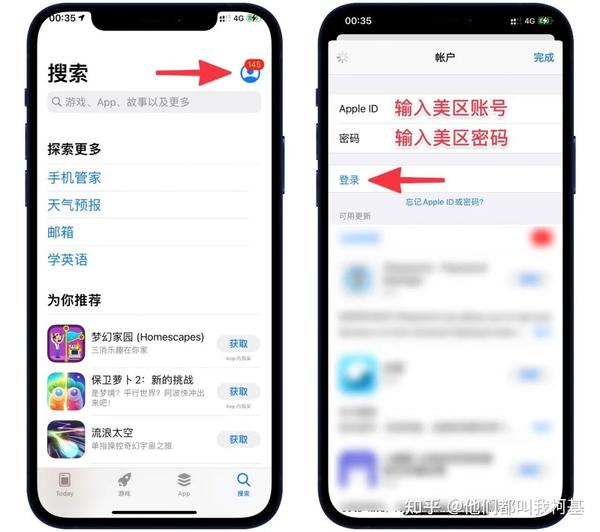
2. Sign In With Your New US Apple ID
Scroll back to the top of the account screen, enter your newly registered US Apple ID and password, and tap Sign In.
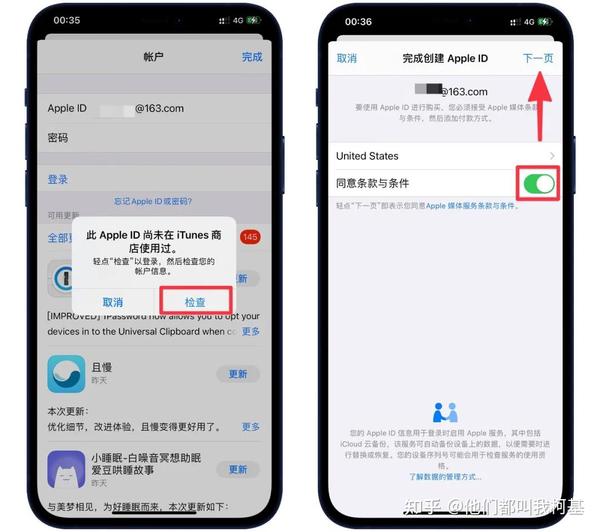
3. First-Time Account Review & Agreement
A prompt will appear stating: "This Apple ID has not yet been used in the iTunes Store". Tap Review. Then toggle on Agree to Terms and Conditions and tap Next in the top-right corner.
4. Confirm Address Details (Continue Directly)
Since you already completed the billing details on the web, do not change anything here. Simply tap Next in the top-right corner, then tap Continue.
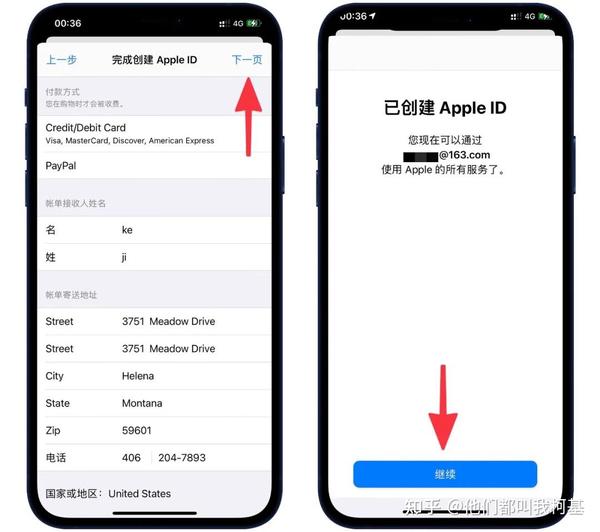
5. Complete & Ready to Download
Tap Continue. The App Store will refresh automatically into the US storefront!
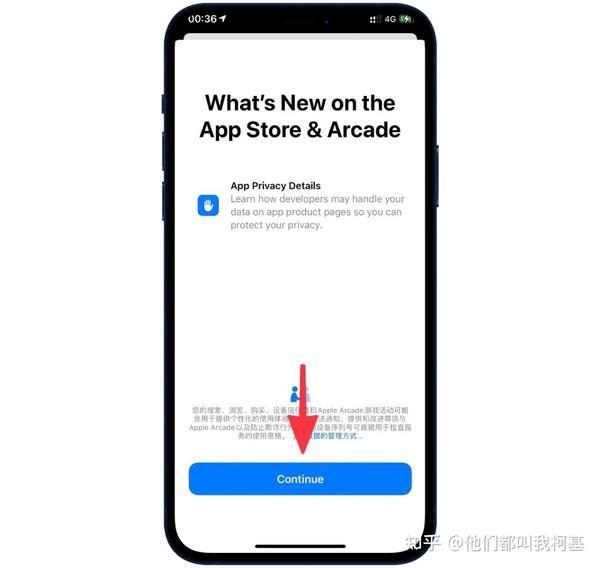
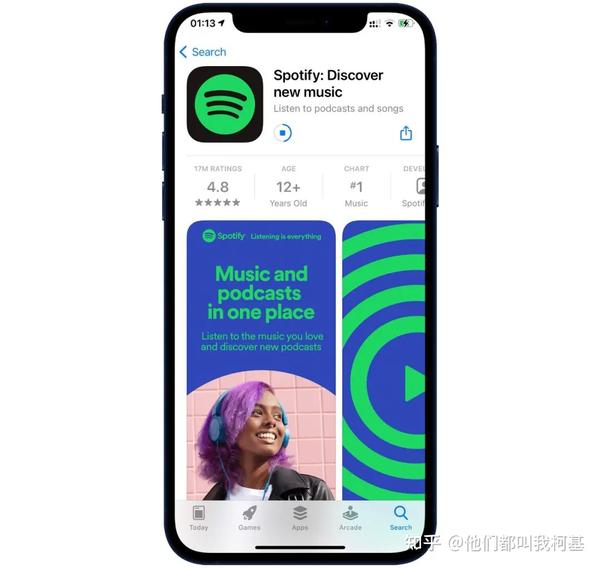
You can now search and install proxy tools such as Anywhere Proxy, Shadowrocket, and other apps exclusive to the US App Store.
IV. Important Notes
- 1. Password Security: Keep your password unique and do not contain your name, birthdate, or email text.
- 2. Only Sign In via App Store: Only switch accounts inside the App Store. Once finished downloading, switch back to your main account; installed apps will continue to work normally.
- 3. Notice for Apple Music Users: If you currently subscribe to Apple Music in another region, switching store accounts will clear cached offline music downloads (re-downloading them after switching back will restore them).
- 4. Use as a Secondary Account: Do not treat this US ID as your primary device account. Use it solely as an app-store downloader account when updating or installing overseas apps.
V. Frequently Asked Questions (FAQ)
1 or +1. If so, remove them. If using a Mainland China phone number, ensure the country code is selected as China (+86).
+1. Remove any leading 1 or +1 from the phone number field.
After registering your US account and downloading the app, return to complete proxy configuration: